Showing posts with label recipe. Show all posts

Saturday, 1 August 2015

Classic Red Skinned Potato Salad


Well its been a busy couple of weeks around here. We had little guy #3 break his arm monkeying around outside. That was the first broken bone ever. Considering we have 4 boys, I think that's pretty good. Hopefully we don't have any more of those….ever!

We also placed 2nd in guy #1's hockey tournament in Duluth, MN……Always a bridesmaid. Hopefully we can take home first in our upcoming tournament. Fingers crossed.

I love potatoes…..and I love dill. I made this summer classic red skinned potato salad a few days ago. It was so good I thought I'd share it with you all.

The bonus part is that I used baby potatoes that were prewashed. So this was easy peasy. No peeling!

Here's the recipe….

2 lbs of red baby potatoes 
2 sticks of celery
2 green onions
5 hard boiled eggs
1 3/4 cups mayonaise
1/4 cup sour cream
fresh dill to taste
salt and pepper

Cut prewashed potatoes in half 

Bring a large pot of water to a boil. Boil potatos until tender. Drain and cool potatoes in the refrigerator.

Chop celery, onions, cooled eggs, and dill.

Combine all ingredients into a large bowl and mix.

Cill for an hour before serving. Enjoy!


Sunday, 5 July 2015

Roasted Vegetable and Grain Salad

Want to add a new salad to your lineup? Try this one. You can eat it cold or warmed up.


It's been busy around our house lately. With a family wedding this past weekend and my husband being in the wedding party there's been barely enough time to do anything around here. 

Dishes are in the sink, laundry is piled up, I can't see one single inch of flooring in our youngests' bedroom (he decided to dig through 4 piles of clean laundry, empty his entire toy box and scatter laundry and toys all over the room)

Awesome!

But, the good news is I made this salad a couple of days ago so I'd have something in the fridge to eat when I want to just grab something quick. 

Same with the kids. They've been eating like crazy and I wanted to have something ready and healthy on hand.

This salad is so good. I love roasted vegetables, so I paired it with some healthy grains to give this salad a hearty feel. 


Some of these vegetables didn't make it into the salad after I roasted them, I couldn't help myself.


Don't these grains just scream hearty and healthy? I love barley.

Here's the recipe….

Roasted Vegetable and Grain Salad

2 cups cooked barley
1 cup cooked quinoa
1 cup chopped cauliflower
1 cup chopped zuchini
1/2 an onion
1 bell pepper (any color)
4 tbsp olive oil
salt and pepper to taste

Italian Dressing

2/3 cup canola oil
1/4 cup white wine vinegar
1/2 tsp garlic powder
1/4 tsp thyme
1/2 tsp parsley
1/4 tsp basil
1 tsp oregano
1/2 tsp onion powder
1/4 tsp celery salt
1/2 tsp sugar
salt & pepper to taste

Preheat oven to 400 degrees F 

Cook your grains and set them aside. You'll need 2 cups of cooked barley and 1 cup of cooked quinoa.

Wash and chop your vegetables. Place them in a 9x13 baking dish and add the oilve oil, salt and pepper.

Bake until vegetables are tender and starting to brown.

While the vegetables are cooking, prepare the dressing by combining the dressing ingredients and whisking vigourously. 

Combine the cooled grains and vegetables and pour the dressing over it. Toss the mixture and place in the fridge.


Monday, 29 June 2015

Bananas Foster Muffins


Today started out a sunny and nice summer morning, somewhere along the way the clouds and fog rolled in. Boo. 

But, on the bright side, perfect baking weather....bonus. 

My kiddos love banana muffins. They ask for them all the time. Everytime they see bananas in the fruit bowl getting really ripe they bug me...non...stop. 

I was kind of getting sick of the same old banana muffins so I though I'd put a twist on this classic favourite.

Then it popped into my head. Why not try bananas foster muffins?

Voila!...here they are.

They're super yummy.


I chopped up the walnuts quite fine. You can omit them too if you'd like.


Doesn't the sauce on top make them look divine?


Here's the recipe

Bananas Foster Muffins

Yield: 12 Muffins  
Bake Time: 20-25 minutes  
Total Time: 40-45 minutes

Ingredients:

2 cups all purpose flour
1 tsp baking powder
1 tsp baking soda
1/2 tsp salt
1/2 tsp cinnamon
3 ripe bananas
3/4 cup sugar
1 egg
3/4 cup butter melted
1 tbsp rum extract or 3 tbsp rum
1/4 cup walnuts


Glaze:

4tbsp brown sugar
2 tbsp butter
2tbsp rum or 1 tbsp rum extract
pinch of cinnamon


Preheat oven to 350 degrees F and prepare 12 muffin tins with liners

In a bowl combine flour, baking powder, baking soda, salt, and cinnamon. In a separate bowl mash bananas, sugar, egg, and rum. combine wet and dry ingredients.

Spoon batter into prepared muffin cups.

Top with chopped walnuts and pat them in gently.

Bake for 20-25 minutes

While the muffins are baking, make the glaze.

Combine brown sugar, rum, butter and cinnamon in a small saucepan and simmer for a few minutes. Whisk frequently. Allow to cool until warm but not hot anymore.

Remove the muffins from the oven and place on wire cooling rack. 

Drizzle glaze on top while muffins are still warm.

Enjoy!


Friday, 26 June 2015

Nutella Multigrain Cheerios Treats

A sweet treat with a healthy twist. Just a few simple ingredients.


Say what?

Healthy multi grain cheerios marries nutella and marshmallow???

Yes! I made these little treats yesterday when the kids were looking for a snack. I didn't want to give them total garbage (we've been trying to eat healthy you know?).

I spotted the cereal in the cupboard and thought, "Why not?…I can make these into a nice little snack."


All you need for these babies is Cheeries (multi grain or honey will do fine), butter, marshmallow, and nutella. That's it! Easy Peasy.


Just melt your butter, add your marshmallows and Nutella


Toss in your Cheerios


Enjoy! These taste like a treat, but are packed with the goodness of multi grains from the Cheerios.


Nutella Multigrain Cheerios

Ingredients:

2 tbs butter
1/3 cup Nutella (more if you love it)
1 10 oz pkg mini marshmallows
6 cups of multigrain Cheerios

Directions:

Melt the butter in a large saucepan. Add the marshmallows and melt on low stirring frequently. Then add your Nutella and stir until incorporated. Stir in the Cheerios and mix until combined.

Spray a 9 x 13 pan with cooking spray and pour in the mixture. Gently pat it down and let it cool.

That's It!

So easy right?

I'm going to need to pick up some more marshmallows so I can make these suckers again.


Tuesday, 23 June 2015

Blueberry Pie Oatmeal…with Chia Seeds


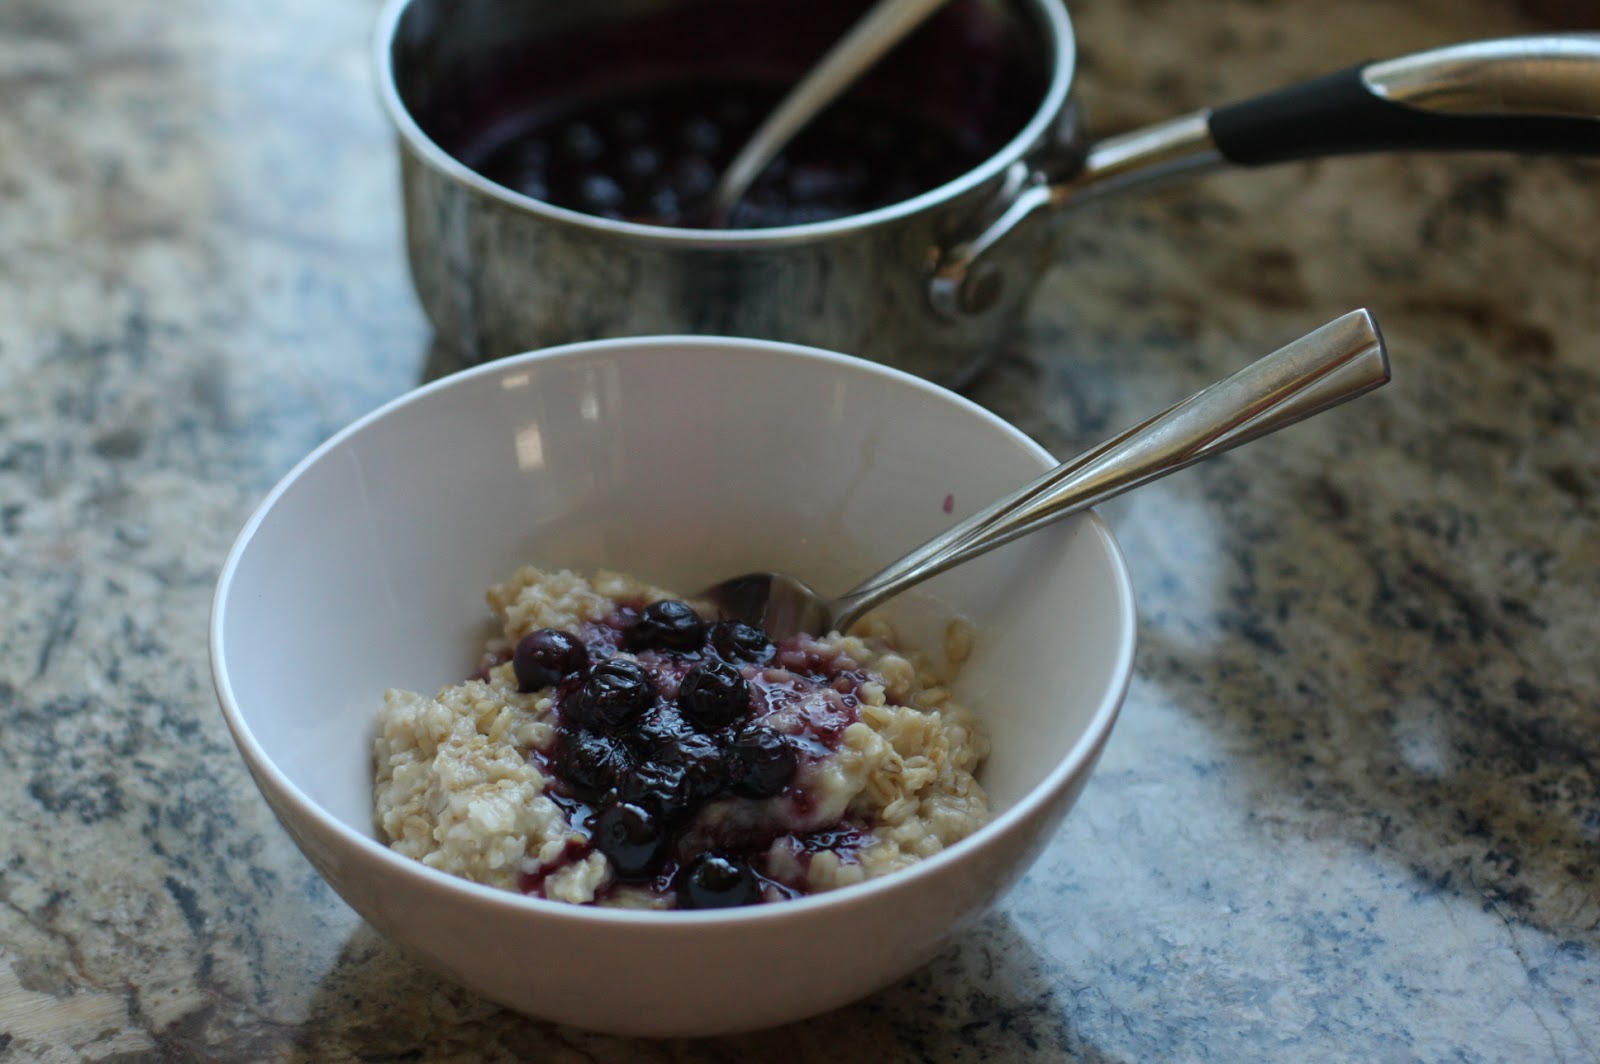
Who wants blueberry pie for breakfast???……..I do!

This Blueberry Pie Oatmeal is so healthy and delicious! What a fabulous healthy twist on a yummy dessert. 

I don't know about you guys but when my kids have oatmeal they keep trying to load on the brown sugar. So today I thought, there's got to be a way to get them to eat oatmeal without complaining for more sugar.

The solution was giving them "Blueberry pie". As soon as I told them I had made them blueberry pie oatmeal they gobbled it right up. They were asking for more "filling" of course, but at least it was healthy stuff.

So here's how I made it….

Cook up some oatmeal


You'll need these…


These frozen blueberries look so beautiful...

Put it all in a saucepan and simmer for 5 minutes…..


 Looks so yummy!…..


Blueberry Pie Oatmeal with Chia

Oats (cook as much as you need as per package)
1 cup frozen blueberries
1 tsp chia seeds
a pinch of cinnamon
1 tbsp water
1 1/2 tbsp maple syrup
1/4 tsp corn starch

1. Cook your oatmeal
2. While oatmeal is cooking, combine blueberries, chia, cinnamon, water, and maple syrup. Sprinkle the corn starch on top. Mix all together and simmer for about five minutes.
3. Spoon oatmeal into a bowl and top with blueberry "pie filling"


Wednesday, 13 May 2015

Artisan Bread On The Grill ~ Baking Bread Outdoors....


I have wanted an outdoor oven ever since I can remember. Well ever since I first got married anyways. I told my husband "I want one for our 10th anniversary" That was just about 10 years ago. lol. I decided I didn't want to wait any longer and wondered if I could bake it on the grill at least. So last night that's just what I did. And it worked!! Such a fun option especially for those hot months when you don't want to heat up your house. Here's how I did it...


Pull out your ingredients 


Proof your yeast


Add the rest of the ingredients (Emmett insisted on partaking in this)


Mix it up by hand or a mixer with a dough hook


Let it rise


Cut the dough in half


Shape it into a loaf and let it rise at least 2 hrs


After 2 hrs looking nice and puffy 


Slash into the dough and dust with flour


Set it out on the grill (I placed an extra pan under the loaf pan for insulation as well a pan of water for moisture)


After 35 minutes (temp on the grill was 400 degrees F)
Looks so yummy!


A little bit of butter and honey on top. The kids are on this bread with honey kick lately. I gotta say I don't blame them.


And there she is....my dream oven!!


Artisan Bread 

Ingredients

3 cups lukewarm water
1 1/2 tbsp granulated yeast
1 1/2 tbsp kosher salt
6 1/2 cups unsifted unbleached all-purpose flour

Instructions

Add yeast to the warm water. Let sit for 5 minutes.

Mix in the flour and salt. Kneading is unnecessary so you can add all of the flour and mix it up. Once I had it lightly mixed up I threw it in the mixer with the dough hook just until it had a uniform consistency and the ingredients were incorporated.

Allow to rise for 2 hrs, make sure to cover it so it doesn't dry out.

Split dough in half to make 2 loaves. I baked one and saved one in the fridge.

Shape dough into a loaf, stretch the surface of the dough all around into the bottom. Cover and allow to rise on a dusted pan for 40 minutes. (don't over dust your pan with flour or you'll end up with a bunch of really dark brown excess flour on the edges of the pan, I did that..lol)

Dust and slash the dough. Slash a quarter inch into the dough in two diagonal lines with a serrated knife)

Preheat grill for 20 minutes. If you have a thermometer on your grill it should read 400 degrees F. Also prepare a pan with water (not necessary but adds moisture) to place on top rack of grill. Place your cookie sheet on grill to create a barrier between the loaf pan and the flames from the grill to help prevent burning.

You can also bake this bread in an oven at 450 degrees F is you choose to

Bake for about 30-35 minutes. If you are baking on the grill you will want to check up on it to make sure it doesn't burn. Mine turned out perfectly at 35 minutes.


This is the basic Boule bread mix recipe from the book "Artisan Bread in five minutes a day" I adapted it to use on the grill.


Saturday, 14 March 2015

Amazing Peanut Butter Cookie Recipe


Ok, So I just made these peanut butter cookies from Just a Pinch. They are so good. I usually make the flourless recipe on the back of the peanut butter jar, but I thought I'd try these. I am so glad I decided to try these out. They are not chewy like the flourless ones. But they are lightly crispy on the outside and soft and yummy on the inside.
I threw in some peanut butter chips and mini chipits. The chipits really brighten them up and the kids gobbled them right up. Sorry for the poor quality Iphone pic, but it's late, it's dark, and guaranteed these won't last until daylight. Follow the link above for the recipe. 

Have a great Saturday night :)

Amanda <3

Saturday, 21 February 2015

Salted Butter Cream Icing


Salted Buttercream Icing

1 cup of salted butter (or unsalted, your choice)
3  teaspoons of vanilla
4 cups of icing sugar
4-5 tablespoons of  coffee cream (18% and up)
1 jar of salted caramel sauce

You can use your favourite buttercream icing for this and just add a little salted caramel at a time. I used this buttercream recipe from The Kitchen Magpie and this recipe for salted caramel  from I Heart Eating.

Once you've made your buttercream, add your pre made and pre cooled salted caramel sauce (link below) to your buttercream a little bit at a time. Start at 1/3 of a cup. Once you've done that whip it up and give it a taste test. If you want more of a caramel flavour add some more. I did. It was soooo delicious. Like I'm talking melt in your mouth delicious. I might have added most of the jar.  Once you get your desired flavour pipe the icing onto your cake or cupcakes drizzle with some of the salted caramel sauce over the cupcakes and finish off with a few sprinkles of crushed sea salt.

These cupcakes only lasted a few minutes in our house. I had to hide one to save for the hubby so he could try how deligood these were. I'm going to need to make another batch of these asap. Seriously delish! 

Amanda <3

Wednesday, 21 December 2011

Torrone


The holidays are here in full swing and it has been mad around my home. Having 3 little boys sure can make Christmas special. But, it sure has been far more challenging getting my baking done with a little one yanking on my legs…lol. These gorgeous little gems are called Torrone, a traditional Italian candy.  They have totally become my favourite holiday treat. Not only are they so pretty and festive looking but they are amazingly delicious and EASY to make.  


Torrone


Ingredients


500 g marshmallows
500g vanilla wafers
500g bakeable jujubes
a few sheets of rice paper


Pour the marshmallows in a large bowl and place in the microwave. Heat for 20 seconds at a time and stir. Do not over cook. Just heat it enough to melt, and stir frequently.
Then in another bowl melt the vanilla wafers in the microwave, also stiring in 20 second intervals to ensure it does not burn. When melted add to marshmallow fluff, mix well. You can place the mixture in the microwave for a few seconds if you find it too cool to stir well. Again, be careful not to overheat.
Then add your candy and mix it together.


 Line a cookie sheet (10 x 15 in) with raised edges with rice paper (shiny side of the paper down). If you have to cut the paper to fit that's ok, but make sure to overlap it or your marshmallow mix will seep through the cracks and stick to the pan. I used zig zag scissors and it looked cute :) You can find these ingredients at your local bulk food store.


Once you have the rice paper down, pour the marshmallow mixture on the paper. This can be a touch trickay as it is sticky. Grease your hands so they don't stick as you press the marshmallow down. A spatula can also be really useful for spreading the mixture out. Keep working it until you fill in the pan from edge to edge. Once most of it is spread out place the rice paper on top as well (shiny side up now). 
Here's the fun part that kids will love. Place another pan inside (9 x 13 in) and step all over it. Stomping and pressing down to flatten the candy.


Put the candy in the fridge for a little while just to harden so it's easier to cut up. Using a pizza cutter is a great way to cut this treat into pieces. I don't bother making sure each and every piece gets cut into the same size. It gets eaten right away anyways, plus I like the homemade chunky cuts and displaying it on a pretty plate or festive jar.


The finished product looks so pretty and makes a great gift idea. I guarantee if you make this once, you'll make it many times over year after year.

Happy Baking…Happy Holidays….enjoy!

Amanda

From our house to yours….Merry Christmas